
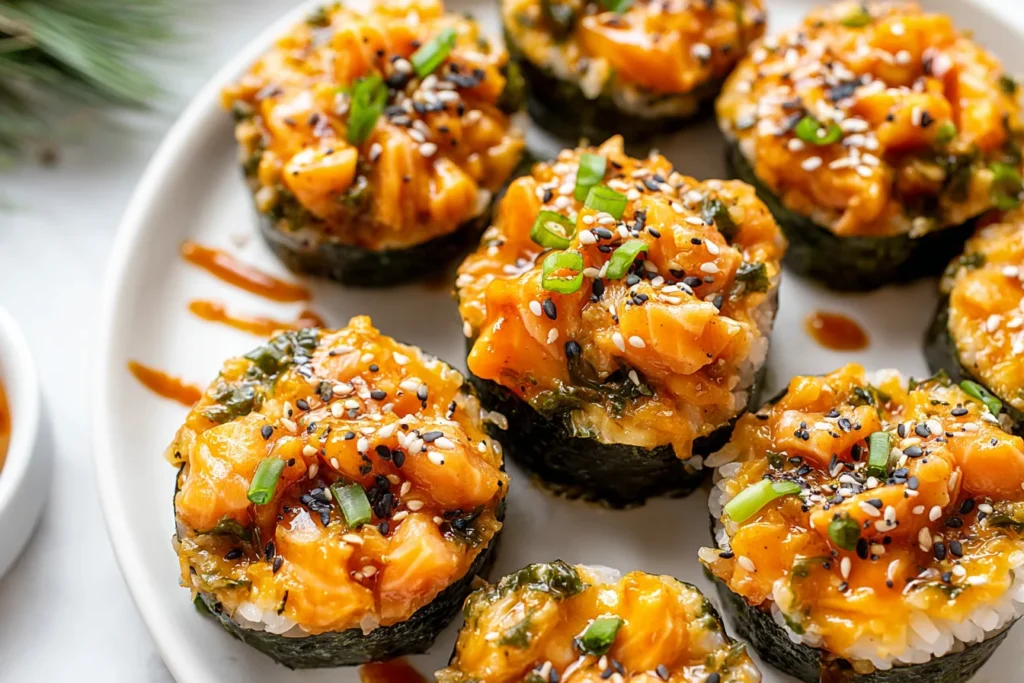
If you’ve been scrolling lately, you’ve probably seen Easy Baked Salmon Sushi Cups popping up everywhere—and for good reason! These little bites are the perfect mix of cozy comfort food and sushi-night vibes, all wrapped into one easy, oven-baked recipe. No rolling mats, no stress, just pure flavor magic.
As Chef Omar, I love recipes that feel fancy but come together effortlessly. And let me tell you—these Easy Baked Salmon Sushi Cups are exactly that. They’re perfect for busy weeknights, casual get-togethers, or when you’re craving sushi but want to stay in your comfy pants (no judgment here!).
Table of Contents
Why You’ll Love This Easy Baked Salmon Sushi Cups Recipe
Let’s be real—anything that combines sushi flavors with a baked, handheld twist is already winning. But here’s why this recipe will become your new obsession:
- Beginner-friendly: No sushi-rolling skills required
- Quick & easy: Ready in just 30 minutes
- Crowd-pleaser: Perfect for parties or family dinners
- Customizable: Spice it up or keep it mild
- Mess-free: Everything bakes neatly in a muffin tin
It’s like sushi met a casserole… and had the cutest, tastiest babies ever.
Ingredients You’ll Need
Before we dive in, let’s gather everything. Simple ingredients, big flavor payoff—that’s how we do things in my kitchen.
For the Sushi Rice:
- 1 ½ cups uncooked sushi rice
- 1 tbsp rice vinegar
- 2 tsp white sugar
For the Salmon Filling:
- 1 lb salmon, cubed
- 1 tbsp light soy sauce
- 1 tbsp Kewpie mayo
- 1 tbsp sriracha
- 1 tsp sesame oil
For Assembly:
- 3 large nori sheets
- Cooking spray
For Garnish:
- Furikake
- 1 green onion, chopped
Step-by-Step: How to Make Easy Baked Salmon Sushi Cups
1. Cook and Season the Rice
Start by cooking your sushi rice according to package instructions. While it’s still warm, mix rice vinegar and sugar in a microwave-safe bowl and heat for about 30 seconds until dissolved.
Pour that mixture over the rice and gently stir. This step gives your rice that classic sushi flavor—slightly tangy, slightly sweet, totally addictive.
2. Prep the Salmon Mixture
In a bowl, combine:
- Cubed salmon
- Soy sauce
- Kewpie mayo
- Sriracha
- Sesame oil
Mix until everything is well coated. The salmon should look glossy and smell amazing already—trust me, it only gets better.
3. Preheat and Prep
Preheat your oven to 400°F.
Cut your nori sheets into squares large enough to line each muffin cup. Lightly spray your muffin tin so nothing sticks (because nobody likes losing half their dinner to the pan!).
4. Assemble the Sushi Cups
Place a nori square into each muffin slot.
- Add a spoonful of sushi rice
- Press it gently to form a base
- Top with the salmon mixture
Repeat until your tray is full. It might feel a little like crafting—and honestly, it’s kind of therapeutic.
5. Bake to Perfection
Bake for 15 minutes, or until the salmon is cooked through and the tops are slightly golden.
Your kitchen will smell like a trendy sushi spot… but better, because you’re not waiting for a table.
6. Garnish and Serve
Let them cool for a few minutes (I know, the wait is hard).
Then:
- Drizzle extra sriracha or spicy mayo
- Sprinkle furikake
- Add chopped green onions
Serve immediately and watch them disappear faster than you can say “seconds, please!”
Chef Omar’s Pro Tips (Because I’ve Got Your Back!)
- Don’t overpack the rice: Press gently—too tight and it gets dense
- Use fresh salmon: It makes a big difference in flavor
- Like it spicy? Add extra sriracha or a dash of chili oil
- No Kewpie mayo? Regular mayo works—just add a tiny splash of rice vinegar
- Crispy lovers tip: Broil for the last 1–2 minutes for golden tops
And hey, if your cups look a little rustic, that’s part of the charm. We’re going for delicious, not perfection.
A Little Kitchen Story
The first time I made these Easy Baked Salmon Sushi Cups, it was totally unplanned. Friends dropped by, I had salmon in the fridge, and honestly… zero energy for rolling sushi.
So I improvised.
Thirty minutes later? Silence at the table. The good kind—the “everyone’s too busy eating” kind. Now it’s one of my go-to recipes whenever I want something impressive without the stress.
FAQs About Easy Baked Salmon Sushi Cups
Can I use cooked salmon instead?
Yes! Just reduce the baking time slightly since the salmon is already cooked.
Can I make these ahead of time?
You can prep everything ahead, but bake them fresh for the best texture.
How do I store leftovers?
Store in an airtight container in the fridge for up to 2 days. Reheat in the oven or air fryer for best results.
Can I swap the salmon?
Absolutely! Try:
Cooked shrimp
Canned tuna (mixed like spicy tuna)
Even tofu for a vegetarian twist
What if I don’t have nori?
You can skip it, but you’ll miss that classic sushi flavor. Rice paper could work in a pinch!
Bringing Easy Baked Salmon Sushi Cups to Your Table
There’s something so satisfying about making a recipe that feels restaurant-worthy but fits into your real life. And these Easy Baked Salmon Sushi Cups do exactly that.
They’re fun, flavorful, and just a little bit fancy—without any of the fuss. Whether you’re cooking for your family, hosting friends, or just treating yourself after a long day, this recipe delivers every single time.
So grab that muffin tin, turn up your favorite playlist, and let’s make something delicious together. Trust me—once you try these Easy Baked Salmon Sushi Cups, they’ll earn a permanent spot in your dinner rotation.
Make It a Meal to Remember
Turn your Easy Baked Salmon Sushi Cups into a full, satisfying spread with a few delicious additions that complement every bite:
- Add something crisp and refreshing like this Mediterranean coleslaw with crunchy veggies to balance the rich, savory salmon.
- For a cozy, nourishing side, try this roasted carrot and chickpea bowl with warm spices—it brings color, texture, and comfort to your plate.
- Keep the flavor theme going with these easy one-pot teriyaki noodles packed with flavor, a quick favorite that pairs beautifully with sushi-inspired dishes.
- Craving more seafood goodness? These crispy cod fish tacos with bold, fresh toppings are always a crowd-pleaser.
- And if you’re curious to explore another take on this trend, check out this baked salmon sushi cup recipe inspiration from Delish for even more creative ideas.
Mix and match your favorites and create a spread that feels fun, flavorful, and totally doable—perfect for any night of the week.