
There’s something magical about the flavor of Orange Creamsicle Dream Bars. One bite and suddenly it feels like a sunny summer afternoon, a creamy orange popsicle melting just fast enough to keep things exciting. Sweet, citrusy, and impossibly creamy—this dessert is the kind that disappears from the fridge faster than you can say save me another piece.
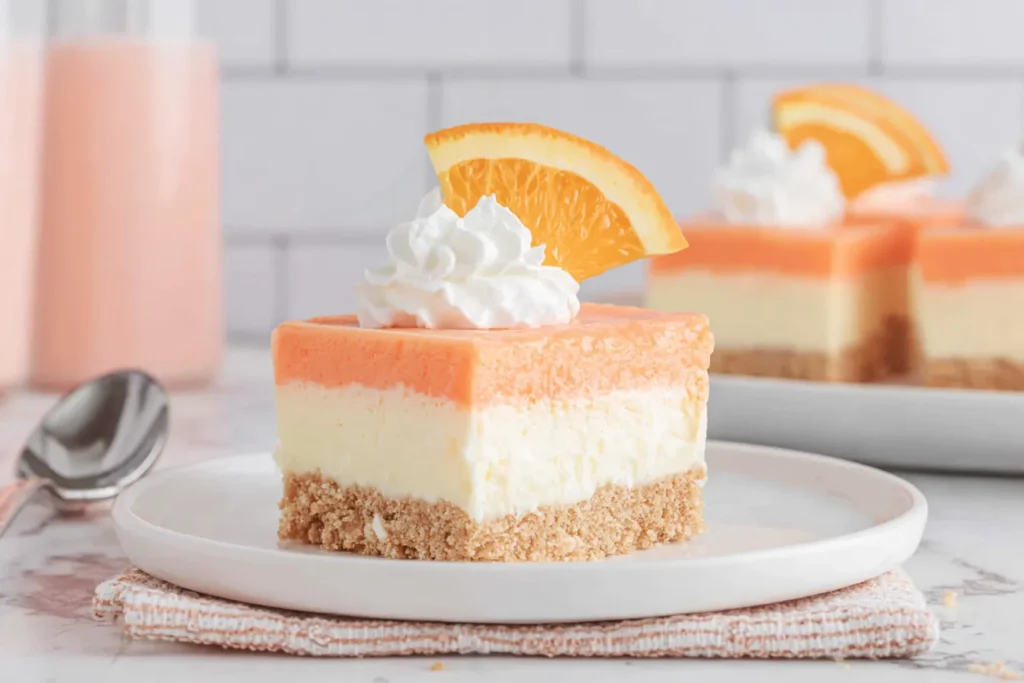
These Orange Creamsicle Dream Bars combine three irresistible layers: a crunchy vanilla cookie crust, a fluffy cheesecake center, and a dreamy orange cream topping that tastes just like the classic frozen treat we all grew up loving. And here’s the best part—no baking required. That means less time hovering over the oven and more time enjoying dessert (which is always a smart life decision).
In my kitchen, I’m all about recipes that feel impressive but don’t require a culinary degree to pull off. These bars check every box: simple steps, nostalgic flavor, and a gorgeous layered look that makes everyone think you spent all afternoon in the kitchen. Spoiler alert—you didn’t.
So grab your mixing bowl, clear a little fridge space, and let’s make a dessert that screams summer happiness.
Table of Contents
Why You’ll Love These Orange Creamsicle Dream Bars
If desserts had a personality test, these bars would score high in charm and comfort. Here’s why they quickly become a family favorite:
No baking required. Perfect for warm days when turning on the oven feels like a bad idea.
Three dreamy textures. Crunchy crust, creamy cheesecake layer, and fluffy orange topping.
That nostalgic creamsicle flavor. Sweet orange and vanilla cream together is pure childhood joy.
Great for gatherings. These slice beautifully and look impressive on dessert trays.
Make-ahead friendly. Since they chill overnight, they’re ideal for prepping the day before a party.
Honestly, these bars are the kind of dessert people request again and again. One bite and suddenly everyone remembers their favorite orange popsicle from childhood.
Ingredients for Orange Creamsicle Dream Bars
Let’s break the recipe down by layers. Each one brings its own flavor and texture to the party.
Nilla Wafer Crust
- 1⅓ cups Nilla Wafer cookie crumbs
- 5 tablespoons unsalted butter, melted
Orange Cream Layer
- 3 ounces orange gelatin
- ¾ cup boiling water
- ¾ cup cold water
- 8 ounces cream cheese, room temperature
- ¼ cup powdered sugar
- 2 teaspoons orange extract
- 8 drops orange gel food color (optional)
- 2 cups Cool Whip
Cheesecake Layer
- 8 ounces cream cheese, room temperature
- 1 cup confectioners’ sugar
- 1 teaspoon vanilla extract
- 1 cup Cool Whip
Additional
- 8 ounces Cool Whip total, divided into three portions
Simple ingredients, big flavor. That’s the kind of cooking philosophy I live by.
How to Make Orange Creamsicle Dream Bars
1. Prepare the Pan
Line an 8×8-inch baking pan with parchment paper. Leave a little overhang on the sides so the bars can be lifted out easily later. This tiny step makes slicing neat squares much easier.
2. Make the Nilla Wafer Crust
In a microwave-safe bowl, melt the butter for about 30 seconds. Stir and heat for another few seconds if needed.
Pulse the Nilla Wafers in a food processor until they become fine crumbs. Mix the crumbs with the melted butter using a spatula until fully combined.
Press the mixture firmly into the lined pan to create an even crust.
Place the pan in the freezer for at least 30 minutes while preparing the next layers.
3. Prepare the Orange Gelatin
In a measuring cup, mix the orange gelatin with ¾ cup boiling water. Stir until fully dissolved.
Add ¾ cup cold water and stir again.
Place the mixture in the refrigerator for about 10 minutes until cooled but not set.
4. Make the Orange Cream Layer
In a mixing bowl, beat the cream cheese with powdered sugar, orange extract, and optional orange food coloring until smooth.
Slowly pour in the cooled gelatin while mixing. Pouring gradually helps create a silky texture.
Place the bowl in the refrigerator for 1 hour so the mixture thickens slightly.
5. Prepare the Cheesecake Layer
In another bowl, beat the cream cheese, confectioners’ sugar, and vanilla until creamy.
Using a spatula, gently fold in 1 cup Cool Whip until fluffy and smooth.
Remove the crust from the freezer and spread the cheesecake mixture evenly across the top.
6. Finish the Orange Cream Layer
Fold the remaining 2 cups Cool Whip into the chilled orange mixture until smooth.
Pour the orange cream over the cheesecake layer and spread evenly with an offset spatula.
7. Chill the Bars
Place the pan in the refrigerator for at least 6 hours, preferably overnight.
This allows the layers to firm up beautifully so they slice into clean squares.
8. Slice and Serve
Lift the dessert from the pan using the parchment paper. Slice into 9 bars and watch them disappear.
Chef Omar’s Helpful Tips
After making these Orange Creamsicle Dream Bars more times than I can count, here are a few tricks that keep them flawless.
Chill the crust well. A frozen crust creates a sturdy base so the cheesecake layer spreads smoothly.
Pour gelatin slowly. Rushing this step can make the mixture slightly lumpy.
Use room-temperature cream cheese. Cold cream cheese doesn’t blend well and can leave little lumps.
Want brighter color? A few drops of orange gel coloring make the top layer look extra vibrant and fun.
For perfectly clean slices: Run a knife under hot water, wipe it dry, then cut the bars.
Little tricks like these make the process smoother—and the results look bakery-worthy.
A Little Kitchen Story
The first time I made these bars, it was during a blazing summer afternoon when turning on the oven felt like a terrible idea. Friends were stopping by unexpectedly (you know the type—“We were just in the neighborhood!”).
I needed something fast, fun, and crowd-pleasing.
These Orange Creamsicle Dream Bars saved the day. When dessert time came around, the room went quiet for about five seconds… followed by the classic line every cook loves:
“Wait… there’s more of this, right?”
Since then, it’s become one of those desserts that pops up all summer long—picnics, BBQs, family dinners, and sometimes just because Tuesday needed a little joy.
FAQs About Orange Creamsicle Dream Bars
Can Orange Creamsicle Dream Bars be made ahead of time?
Yes! In fact, they’re even better when made the night before. The extra chilling time helps the layers set perfectly and makes slicing much easier.
How long do Orange Creamsicle Dream Bars last in the fridge?
Stored in an airtight container, they stay fresh for 3–4 days in the refrigerator.
Can the Nilla Wafer crust be replaced?
Absolutely. Graham cracker crumbs or vanilla sandwich cookies work beautifully as substitutes and still complement the orange cream flavor.
Why use less water for the gelatin?
Using the reduced water amount makes the gelatin more stable. That keeps the orange cream layer firm enough to hold its shape when sliced.
What if the gelatin thickens too much?
If the orange mixture sits in the fridge longer than an hour, small gelatin bits may form. This doesn’t change the taste at all—it simply adds a slightly textured look.
A Sweet Finish Worth Sharing
Desserts should feel joyful, a little nostalgic, and completely irresistible—and Orange Creamsicle Dream Bars deliver on all three. With their buttery cookie crust, fluffy cheesecake center, and vibrant orange cream topping, every bite feels like summer in dessert form.
Whether they’re served at a backyard BBQ, a family gathering, or just a quiet evening treat, these bars always bring smiles (and usually requests for seconds).
So the next time you’re craving something creamy, citrusy, and delightfully easy, whip up a batch of Orange Creamsicle Dream Bars. Your kitchen will smell like sweet orange sunshine—and dessert might just become the highlight of the day.
Sweet Dessert Ideas to Try Next
If the creamy citrus flavor of Orange Creamsicle Dream Bars left everyone asking for another slice, a few other sweet treats might be just as exciting to add to the dessert lineup. For another take on this nostalgic favorite, check out Orange Creamsicle Dream Bars recipe inspiration, where the classic orange-and-cream combination shines in a slightly different style.
And when the mood calls for more easy, crowd-pleasing sweets, these recipes bring plenty of flavor and fun to the table:
- For a rich and fluffy chocolate dessert that feels almost like a cloud in a bowl, try the irresistible Oreo chocolate mousse recipe.
- If fruity desserts are calling your name, the bright and cheerful raspberry zinger poke cake adds vibrant berry flavor to any gathering.
- Need a quick party dessert that disappears fast? The bite-sized Butterfinger balls recipe is sweet, crunchy, and wonderfully addictive.
- For something simple yet elegant, the classic chocolate covered strawberries recipe makes any dessert table feel a little more special.
Mixing a few of these treats with Orange Creamsicle Dream Bars creates a colorful dessert spread perfect for celebrations, weekend gatherings, or those moments when something sweet simply makes the day better.
Print
Orange Creamsicle Dream Bars
- Total Time: 7 hours 10 minutes
- Yield: 9 bars 1x
Description
Orange Creamsicle Dream Bars are a refreshing no-bake dessert with three irresistible layers: a buttery Nilla wafer crust, creamy cheesecake filling, and a smooth orange cream topping. This nostalgic summer treat is light, creamy, and packed with bright citrus flavor—perfect for gatherings, BBQs, or a sweet family dessert.
Ingredients
Nilla Wafer Crust
1 ⅓ cups Nilla Wafer cookie crumbs
5 tablespoons unsalted butter, melted
Orange Cream Layer
3 ounces orange gelatin
¾ cup boiling water
¾ cup cold water
8 ounces cream cheese, room temperature
¼ cup powdered sugar
2 teaspoons orange extract
8 drops orange gel food color (optional)
2 cups Cool Whip
Cheesecake Layer
8 ounces cream cheese, room temperature
1 cup confectioners’ sugar
1 teaspoon pure vanilla extract
1 cup Cool Whip
Instructions
Line an 8×8-inch baking pan with parchment paper so the bars can easily be lifted out for slicing.
Melt the butter in the microwave for about 30 seconds. Stir until fully melted.
Pulse Nilla Wafers in a food processor until fine crumbs form. Mix crumbs with melted butter until evenly combined.
Press the mixture firmly into the prepared pan to form an even crust. Place the pan in the freezer for at least 30 minutes.
In a measuring cup, combine the orange gelatin with boiling water and stir until dissolved.
Add the cold water and stir well. Refrigerate for about 10 minutes until cooled but not set.
Beat cream cheese, powdered sugar, orange extract, and food coloring until smooth.
Slowly pour in the cooled gelatin while mixing continuously until fully blended.
Refrigerate the mixture for 1 hour so it thickens slightly.
Beat cream cheese, confectioners’ sugar, and vanilla until smooth and creamy.
Gently fold in 1 cup Cool Whip until light and fluffy.
Spread the cheesecake mixture evenly over the frozen crust.
Fold the remaining Cool Whip into the chilled orange mixture until smooth.
Spread the orange cream evenly over the cheesecake layer.
Refrigerate the bars for at least 6 hours, preferably overnight.
Lift from the pan using the parchment paper and slice into squares before serving.
Notes
Use the water amounts listed in this recipe for the gelatin rather than the package directions. Using less water creates a more stable orange layer that holds its shape when sliced.
If the orange mixture chills longer than one hour, small gelatin pieces may form. This does not affect the flavor and is purely cosmetic.
For clean slices, dip a knife in warm water and wipe dry before cutting each bar.
- Prep Time: 30 minutes
- Cook Time: 0 minutes
- Category: Dessert
- Method: No-Bake
- Cuisine: American
Nutrition
- Serving Size: 1 bar
- Calories: 484 kcal
- Sugar: 40 g
- Sodium: 307 mg
- Fat: 29 g
- Saturated Fat: 17 g
- Unsaturated Fat: 9 g
- Trans Fat: 0.3 g
- Carbohydrates: 52 g
- Fiber: 0.4 g
- Protein: 6 g
- Cholesterol: 76 mg