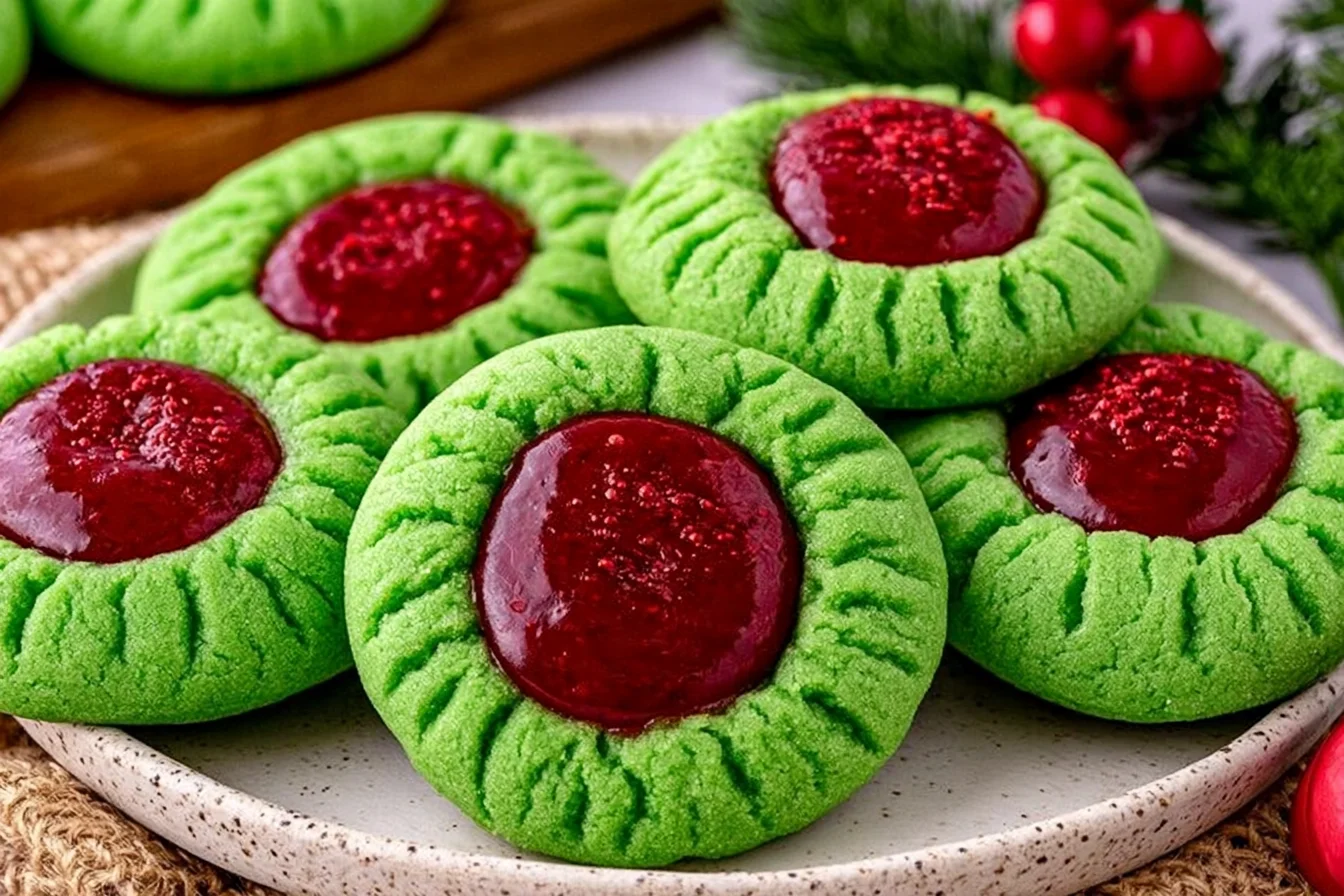
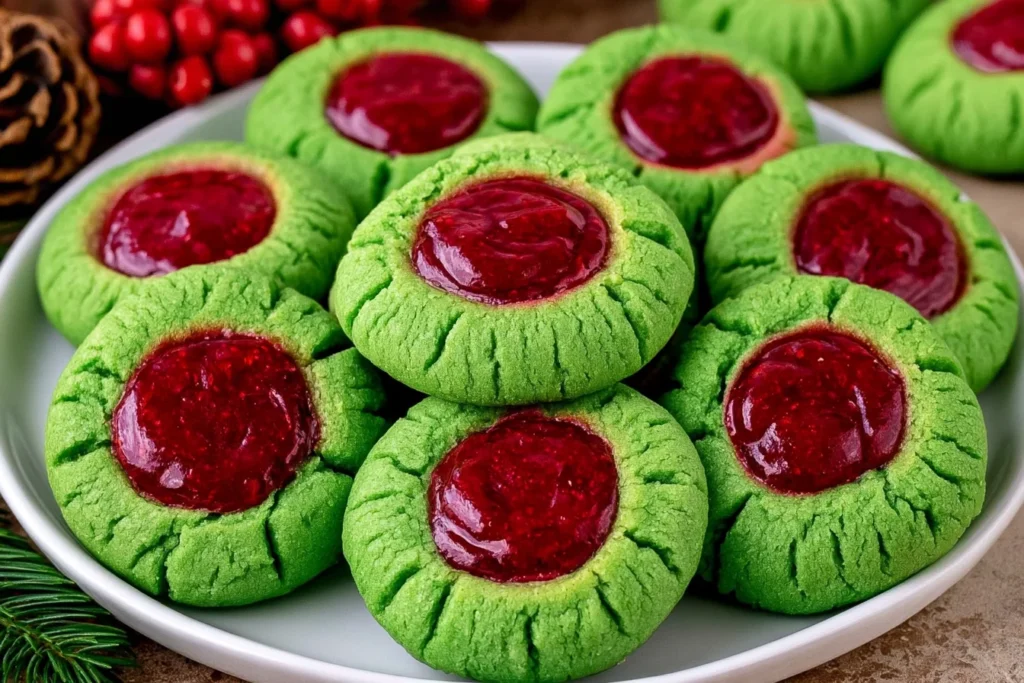
There’s something magical about holiday cookies that look as adorable as they taste! These Grinch Thumbprint Cookies bring a playful twist to classic buttery thumbprint cookies with their bright green color and cheerful red jam centers. They’re soft, tender, slightly crisp around the edges, and filled with sweet, fruity goodness.
If you’re looking for an easy Christmas cookie recipe that will make your holiday dessert table stand out, you’ve found it! These festive little treats are perfect for Christmas parties, cookie exchanges, family baking days, or cozy evenings watching holiday movies.
And the best part? You don’t need fancy equipment or complicated decorating skills. Just a few simple ingredients, a little green food coloring, and your favorite red jam.
As Chef Omar, I believe holiday baking should be fun, delicious, and stress-free. So grab your mixing bowl, turn on your favorite Christmas playlist, and let’s make some cookies that even the Grinch might have trouble resisting!
Table of Contents
Why You’ll Love These Grinch Thumbprint Cookies
- Easy to Make: Simple ingredients and beginner-friendly instructions make these cookies perfect for all skill levels.
- Festive Christmas Colors: Bright green cookies with ruby-red jam centers instantly add holiday cheer to any dessert table.
- Buttery and Delicious: Each cookie has a tender, melt-in-your-mouth texture with a sweet, fruity center.
- Kid-Friendly Fun: Children will love rolling the green dough and making little thumbprints.
- Perfect for Holiday Gifting: These colorful cookies look beautiful in Christmas cookie boxes and homemade gift baskets.
- Customizable Filling: Use raspberry, strawberry, or another favorite red fruit jam.
Ingredients you’ll Need
One of my favorite things about this recipe is how easily it comes together using basic baking ingredients.
You might already have almost everything in your kitchen!
Cookie Dough Ingredients
- 1 cup unsalted butter, softened: Creates a rich, buttery flavor and tender cookie texture.
- 2/3 cup granulated sugar: Adds sweetness without overpowering the fruity filling.
- 1 large egg yolk: Helps bind the dough and gives the cookies a delicate texture.
- 1 teaspoon vanilla extract: Adds a warm, sweet flavor that pairs beautifully with butter.
- 2 cups all-purpose flour: Provides the structure needed to hold the thumbprint shape.
- 1/2 teaspoon salt: Balances the sweetness and enhances the other flavors.
- Green food coloring: Gives the cookies their signature bright green appearance.
- Red jam, such as raspberry or strawberry: Creates the colorful, fruity centers.
Choosing the Best Jam
For the most attractive results, choose a thick red jam.
Raspberry jam gives the cookies a slightly tangy flavor, while strawberry jam provides a sweeter, milder taste.
I personally love how raspberry jam balances the buttery dough.
If your jam contains large fruit pieces, stir it well before filling the cookies. You can also gently mash the pieces with a fork.
This makes it easier to create smooth, beautiful centers.
How to Make Grinch Thumbprint Cookies
Making these colorful Christmas cookies is surprisingly simple.
Follow these steps for delicious cookies with tender centers and lightly golden edges.
Step 1: Cream the Butter and Sugar
Place 1 cup of softened unsalted butter and 2/3 cup of granulated sugar in a large mixing bowl.
Using an electric mixer or a sturdy wooden spoon, beat the mixture until light and fluffy.
This usually takes about 2–3 minutes with an electric mixer.
The mixture should become pale, creamy, and slightly airy.
Next, add the egg yolk and vanilla extract.
Mix until everything is fully combined.
Chef Omar’s Tip: Make sure your butter is softened, not melted. Melted butter can cause the cookies to spread too much during baking.
Step 2: Add the Dry Ingredients
In a separate bowl, combine the all-purpose flour and salt.
Gradually add the dry ingredients to the butter mixture.
Mix gently until a soft cookie dough forms.
Avoid overmixing because too much mixing can make the cookies firm instead of tender.
The dough should hold together when pressed.
If it looks slightly crumbly at first, gently bring it together with your hands.
Step 3: Color the Dough Green
Now comes the fun part!
Add a few drops of green food coloring to the cookie dough.
Gently knead or mix until the color spreads evenly throughout.
Continue adding food coloring gradually until you reach your desired shade of green.
For a bright Christmas look, use a vibrant green.
Gel food coloring is especially useful because it produces a strong color without adding much extra moisture.
Just remember: a little goes a long way!
Step 4: Shape the Cookies
Preheat your oven to 350°F (175°C).
Line a large baking sheet with parchment paper.
Roll the green cookie dough into small balls, approximately 1 inch in diameter.
Place the dough balls on the prepared baking sheet, leaving about 2 inches between them.
Using your thumb or the rounded back of a small spoon, gently press an indentation into the center of each dough ball.
Don’t press all the way through the dough.
You want a small well that can hold the jam without leaking.
If the edges crack slightly, gently smooth them with your fingers.
Step 5: Add the Red Jam
Using a small spoon, carefully fill each indentation with raspberry or strawberry jam.
Start with approximately 1/4 teaspoon per cookie, adjusting according to the size of the indentation.
Avoid overfilling.
Too much jam can bubble over the sides while the cookies bake.
The goal is a neat red center surrounded by bright green dough.
The contrast is what gives these Grinch Thumbprint Cookies their irresistible holiday appearance.
Step 6: Bake Until Perfect
Place the baking sheet in your preheated oven.
Bake for 12–15 minutes, or until the cookies are set and the edges are lightly golden.
Keep a close eye on them during the final minutes.
Because the dough is green, excessive browning can make the cookies look less vibrant.
The centers may still feel slightly soft when you remove the cookies from the oven.
That’s perfectly normal!
They will continue to firm up as they cool.
Step 7: Cool and Serve
Allow the cookies to rest on the baking sheet for approximately 5 minutes.
Carefully transfer them to a wire rack.
Let them cool completely before serving or storing.
The jam will be very hot immediately after baking, so give it time to set.
Once cooled, arrange the cookies on a festive serving platter and enjoy!
Chef Omar’s Best Tips for Perfect Grinch Thumbprint Cookies
Want your Christmas cookies to look as beautiful as they taste?
Here are a few tricks I recommend.
1. Use Room-Temperature Butter
Softened butter blends smoothly with sugar and creates a tender cookie.
Cold butter is difficult to cream, while melted butter can make the dough spread.
2. Choose Gel Food Coloring
Gel food coloring provides vibrant results without changing the dough’s consistency too much.
Add it gradually until you achieve your preferred shade.
3. Keep the Cookies Uniform
Roll the dough into similarly sized balls.
This helps the cookies bake evenly and makes your finished batch look more professional.
4. Don’t Overfill the Centers
A little jam goes a long way.
Overfilled thumbprints can overflow during baking and create sticky edges.
5. Chill the Dough if Necessary
If the dough becomes too soft or sticky, refrigerate it for 15–20 minutes before shaping.
This makes rolling easier and may help reduce spreading.
6. Avoid Overbaking
Remove the cookies when the edges are just beginning to turn golden.
Overbaking can dry out the cookies and dull their festive green color.
7. Let the Jam Cool Completely
Freshly baked jam is extremely hot.
Allow the cookies to cool before serving, especially if children are helping with holiday baking.
Fun Variations to Try
Although the original Grinch Thumbprint Cookies are delicious, you can experiment with different flavors and decorations.
Strawberry Grinch Cookies
Use strawberry jam for a sweeter, more familiar fruity filling.
This version is especially popular with kids.
Raspberry Grinch Cookies
Choose seedless raspberry jam for a smoother texture and slightly tart contrast.
Chocolate-Filled Grinch Cookies
For a different twist, replace the red jam with a small amount of chocolate-hazelnut spread.
The result won’t have the classic red-and-green appearance, but it will still taste delicious.
Extra Festive Cookies
Add a few holiday sprinkles around the edges before baking.
Just keep the decorations light so the pretty green dough remains visible.
FAQs About Grinch Thumbprint Cookies
Can I make Grinch Thumbprint Cookies ahead of time?
Absolutely! You can prepare the dough a day in advance and refrigerate it in an airtight container. Let it soften slightly before shaping if it becomes too firm.
Why are my thumbprint cookies spreading?
Cookies may spread if the butter is too warm or the dough becomes overly soft. Chilling the shaped dough for 15–20 minutes before baking can help.
Can I use strawberry jam instead of raspberry jam?
Yes! Both strawberry and raspberry jam work beautifully. Choose whichever flavor your family enjoys most.
How do I keep the cookies bright green?
Use gel food coloring and avoid overbaking. Remove the cookies once the edges are lightly golden.
Can I make these cookies without food coloring?
Of course. The cookies will have a traditional buttery color instead of green, but the flavor will remain delicious.
Why is my cookie dough crumbly?
Thumbprint cookie dough can appear slightly crumbly because it contains a generous amount of butter and relatively little liquid. Gently press the dough together with your hands. Avoid adding extra flour.
Make Your Christmas Sweeter with Grinch Thumbprint Cookies
Holiday baking doesn’t need to be complicated to feel special.
Sometimes, the simplest recipes create the happiest memories.
These Grinch Thumbprint Cookies combine buttery homemade cookies, sweet red jam, and cheerful Christmas colors in one adorable treat.
They’re easy enough for beginner bakers, fun enough for family baking sessions, and festive enough to impress guests at holiday gatherings.
Whether you’re filling Christmas cookie boxes, preparing treats for a classroom party, or enjoying a quiet afternoon of baking, these cookies are sure to bring a little extra joy to the season.
So gather your ingredients, invite someone to help, and make a batch of these delightful Grinch Thumbprint Cookies.
More Festive Christmas Treats You’ll Love
Love these Grinch Thumbprint Cookies? Keep the holiday baking fun going with these delicious Christmas desserts! Whether you’re planning a festive cookie exchange, preparing homemade gifts, or creating a beautiful holiday dessert table, these sweet recipes are worth trying:
- Peppermint Crunch Balls – These festive, minty treats are perfect for Christmas parties, holiday gift boxes, and anyone who loves peppermint desserts.
- Bakery-Style Gingerbread White Chocolate Chip Cookies – Soft, warmly spiced Christmas cookies loaded with sweet white chocolate chips.
- White Christmas Charlotte Cake – An elegant holiday dessert that’s perfect for impressing guests at your Christmas celebration.
- Chocolate Espresso Banana Bread – A rich, chocolatey homemade treat that’s wonderful for cozy winter mornings and holiday gatherings.
⭐ Did you try these Grinch Thumbprint Cookies? We’d love to hear from you! Leave a comment below and rate this recipe with 5 stars if you loved it! Your feedback helps other home bakers discover delicious Christmas recipes.

Grinch Thumbprint Cookies
- Total Time: 35 minutes
- Yield: Approximately 30 cookies 1x
Description
These festive Grinch Thumbprint Cookies are soft, buttery Christmas cookies with bright green dough and sweet red raspberry jam centers. Easy to make with simple ingredients, they’re perfect for holiday parties, Christmas cookie exchanges, and festive dessert trays!
Ingredients
1 cup (226 g) unsalted butter, softened
2/3 cup (133 g) granulated sugar
1 large egg yolk
1 teaspoon vanilla extract
2 cups (250 g) all-purpose flour
1/2 teaspoon salt
Green food coloring (preferably gel)
1/3 cup raspberry or strawberry jam, approximately, for filling
Instructions
1. Cream the Butter and Sugar: In a large mixing bowl, beat the softened butter and granulated sugar together for 2–3 minutes until light and fluffy.
2. Add the Egg Yolk and Vanilla: Mix in the egg yolk and vanilla extract until fully incorporated.
3. Combine the Dry Ingredients: In a separate bowl, whisk together the flour and salt. Gradually add them to the butter mixture, mixing until a soft dough forms.
4. Color the Dough: Add green food coloring a few drops at a time. Gently mix until the dough is evenly colored a vibrant green.
5. Preheat the Oven: Preheat your oven to 350°F (175°C). Line two baking sheets with parchment paper.
6. Shape the Cookies: Roll the dough into approximately 1-inch balls. Arrange them on the prepared baking sheets, leaving about 2 inches between cookies.
7. Make the Thumbprints: Use your thumb or the back of a small spoon to create an indentation in the center of each cookie.
8. Add the Jam: Fill each indentation with approximately 1/4 teaspoon of raspberry or strawberry jam. Avoid overfilling.
9. Bake the Cookies: Bake for 12–15 minutes, until the cookies are set and their edges are lightly golden.
10. Cool and Serve: Allow the cookies to cool on the baking sheet for 5 minutes before transferring them to a wire rack. Let cool completely before serving.
Notes
Butter Temperature: Use softened butter, not melted butter, for the best cookie texture.
Food Coloring: Gel food coloring creates a brighter green color without adding excess moisture.
Jam Filling: Seedless raspberry or strawberry jam works best for smooth, glossy centers.
Prevent Spreading: If the dough feels too soft, refrigerate it for 15–20 minutes before baking.
Avoid Overbaking: Remove the cookies when the edges are just lightly golden to maintain their vibrant green color.
Storage: Store completely cooled cookies in an airtight container at room temperature for 3–4 days, depending on the jam’s storage requirements.
Make Ahead: Prepare the dough up to 24 hours in advance and refrigerate until ready to use.
- Prep Time: 20 minutes
- Cook Time: 15 minutes
- Category: Dessert
- Method: Baking
- Cuisine: American
Nutrition
- Serving Size: 1 cookie
- Calories: 135 kcal
- Sugar: 7 g
- Sodium: 50 mg
- Fat: 7.8 g
- Saturated Fat: 4.8 g
- Unsaturated Fat: 2.5 g
- Trans Fat: 0 g
- Carbohydrates: 15 g
- Fiber: 0 g
- Protein: 1 g
- Cholesterol: 27 mg